Process
Process was a key aspect of this project. I had an idea in my head of a final creation, but achieving this would require a multitude of steps over many months. In addition, because microbial colonies take weeks, and even months, to grow, I needed to invest in planning up front. I organize my process by these phases:
Research
I started my project by researching about Winogradsky columns. A Winogradsky column is a container which provides a growth environment for silt or soil samples containing microbes. The container must be clear to allow light to enter, and open at the top to permit gases produced by the microbes to escape. Traditionally, Winogradsky columns are made from cylindrical vessels such as beakers or graduated cylinders.
I also learned that adding different chemicals can produce different effects within the column. Most common additives include a carbon source (such as cellulose); calcium (such as eggshell); sulfur (such as egg yolk or magnesium sulfide); fertilizer (to boost nitrogen or potassium levels); and distilled water (to maintain moisture levels).
Finally, I learned that microbes have a tremendous range and variety, which can be seen in the gradient of a mature Winogradsky column. At the bottom, where there is the least oxygen, may be found black or purple sulfur-reducing anaerobic bacteria. Above, aerobic cyanobacteria produce oxygen through photosynthesis. Other microbes love salt (halophiles).
Collection
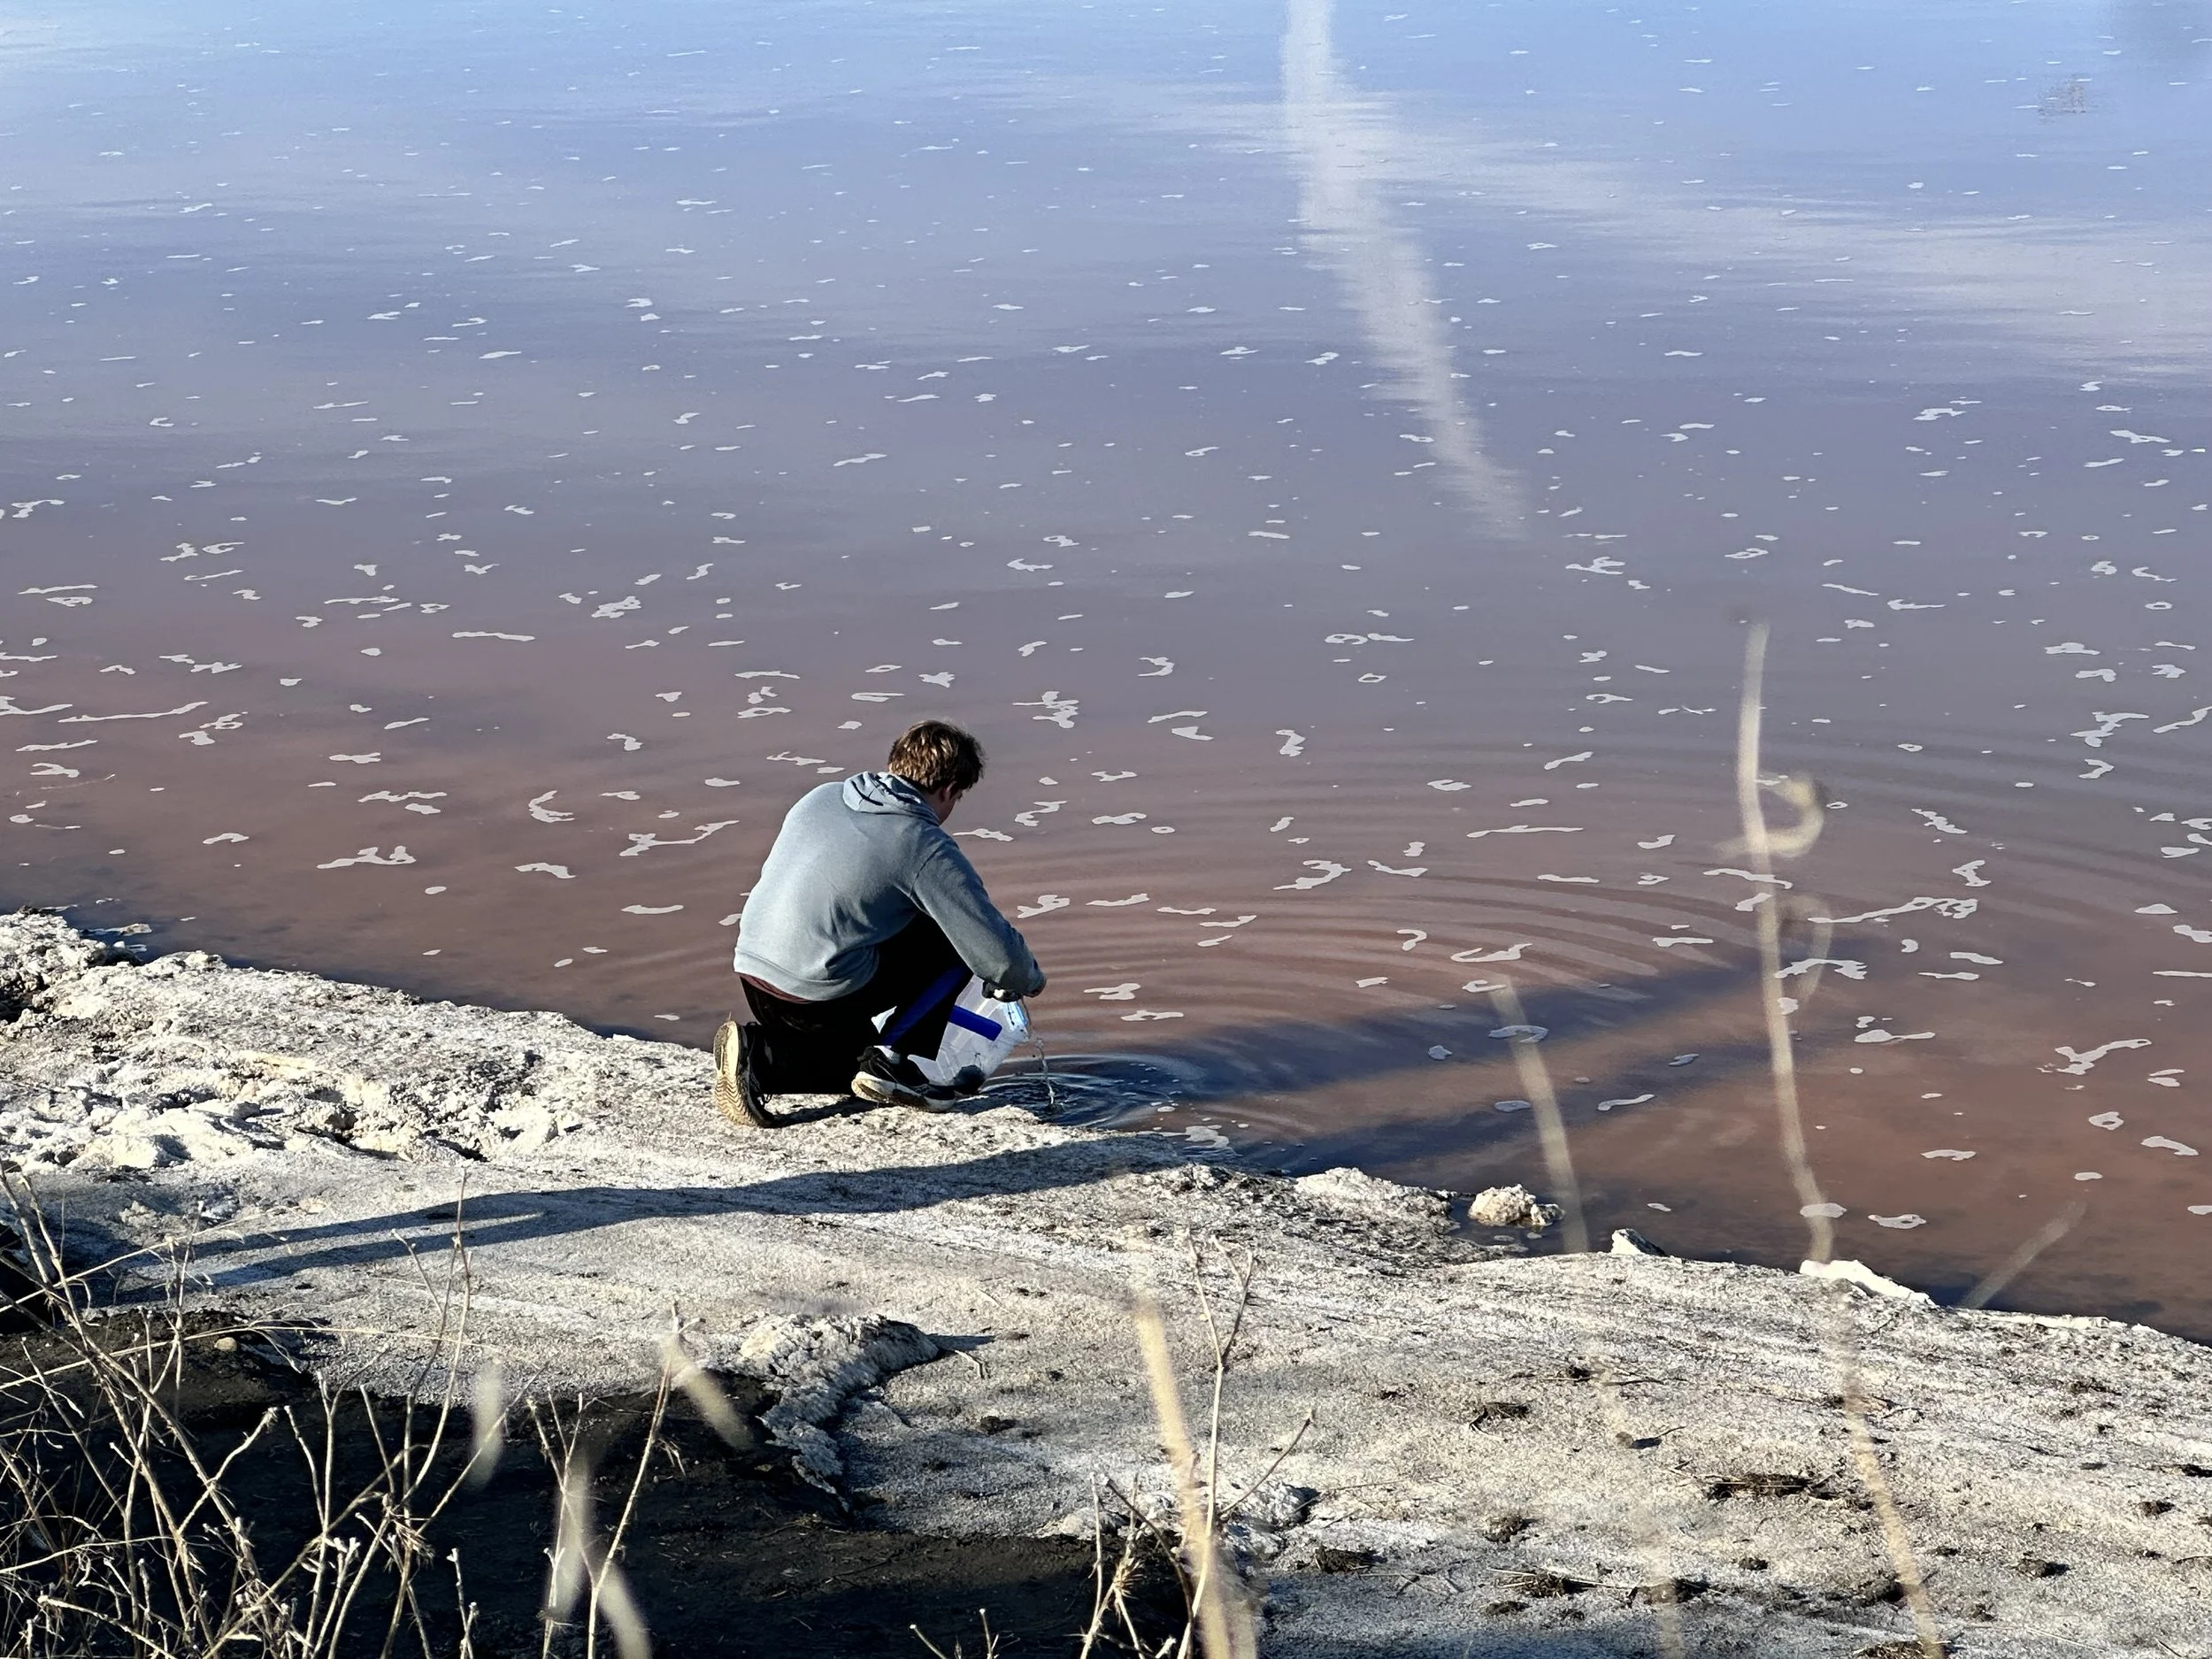
A key point of my project was to incorporate my local environment; I wanted to make visible the microbial ecosystem that surrounds Khan Lab School. I also aimed to collect samples from a range of local spots in order to get a diversity of results. I used google maps to search for bodies of water with feasible access points. I then took trips to scout these locations and, where possible, collect samples. I used shovels, buckets, mason jars and closed-top storage bins. Many times, my access was impeded by steep slopes (Stevens Creek Resevoir), deep mud (Aviso Salt Flats), or dry creek beds. Ultimately, I collected samples from:
Stevens Creek, Cupertino (freshwater)
Hale Creek, Los Altos Hills (freshwater)
Shoreline Lake, Mountain View (brackish water)
Baylands, Palo Alto (saltwater)
Alviso Salt Flats, Alviso (saltwater)

Small-Scale Experimentation
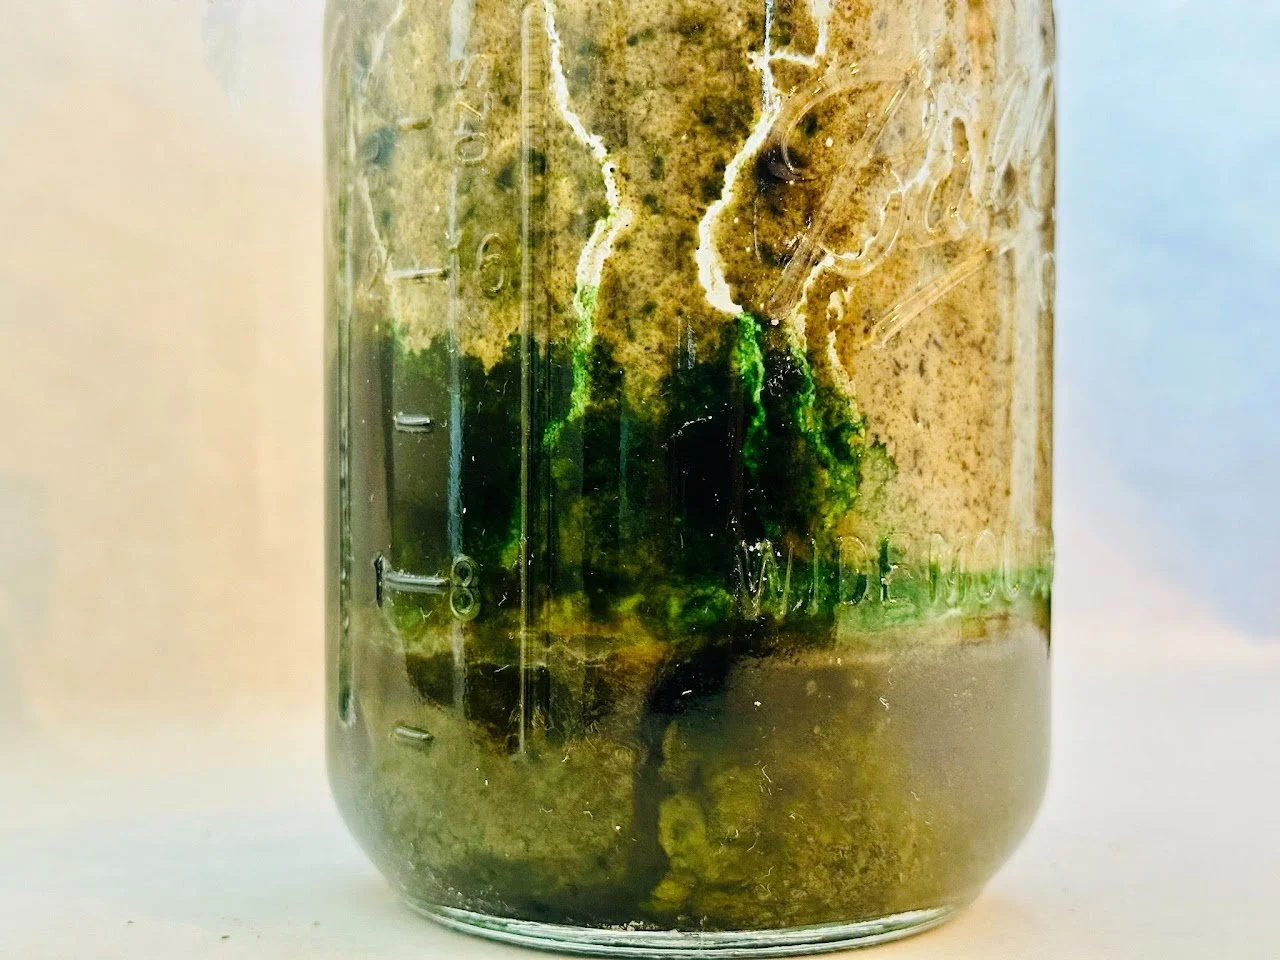
Next, I experimented with the samples on a small scale, using Mason jars as Winogradsky columns. I split each sample into multiple jars so that I could test four "recipes" per sample:
Silt + eggshell + sawdust
Silt + eggshell + sawdust + egg yolk
Diatomaceous earth (growth medium) + silt+ eggshell + sawdust
Diatomaceous earth (growth medium) + silt+ eggshell + sawdust + egg yolk
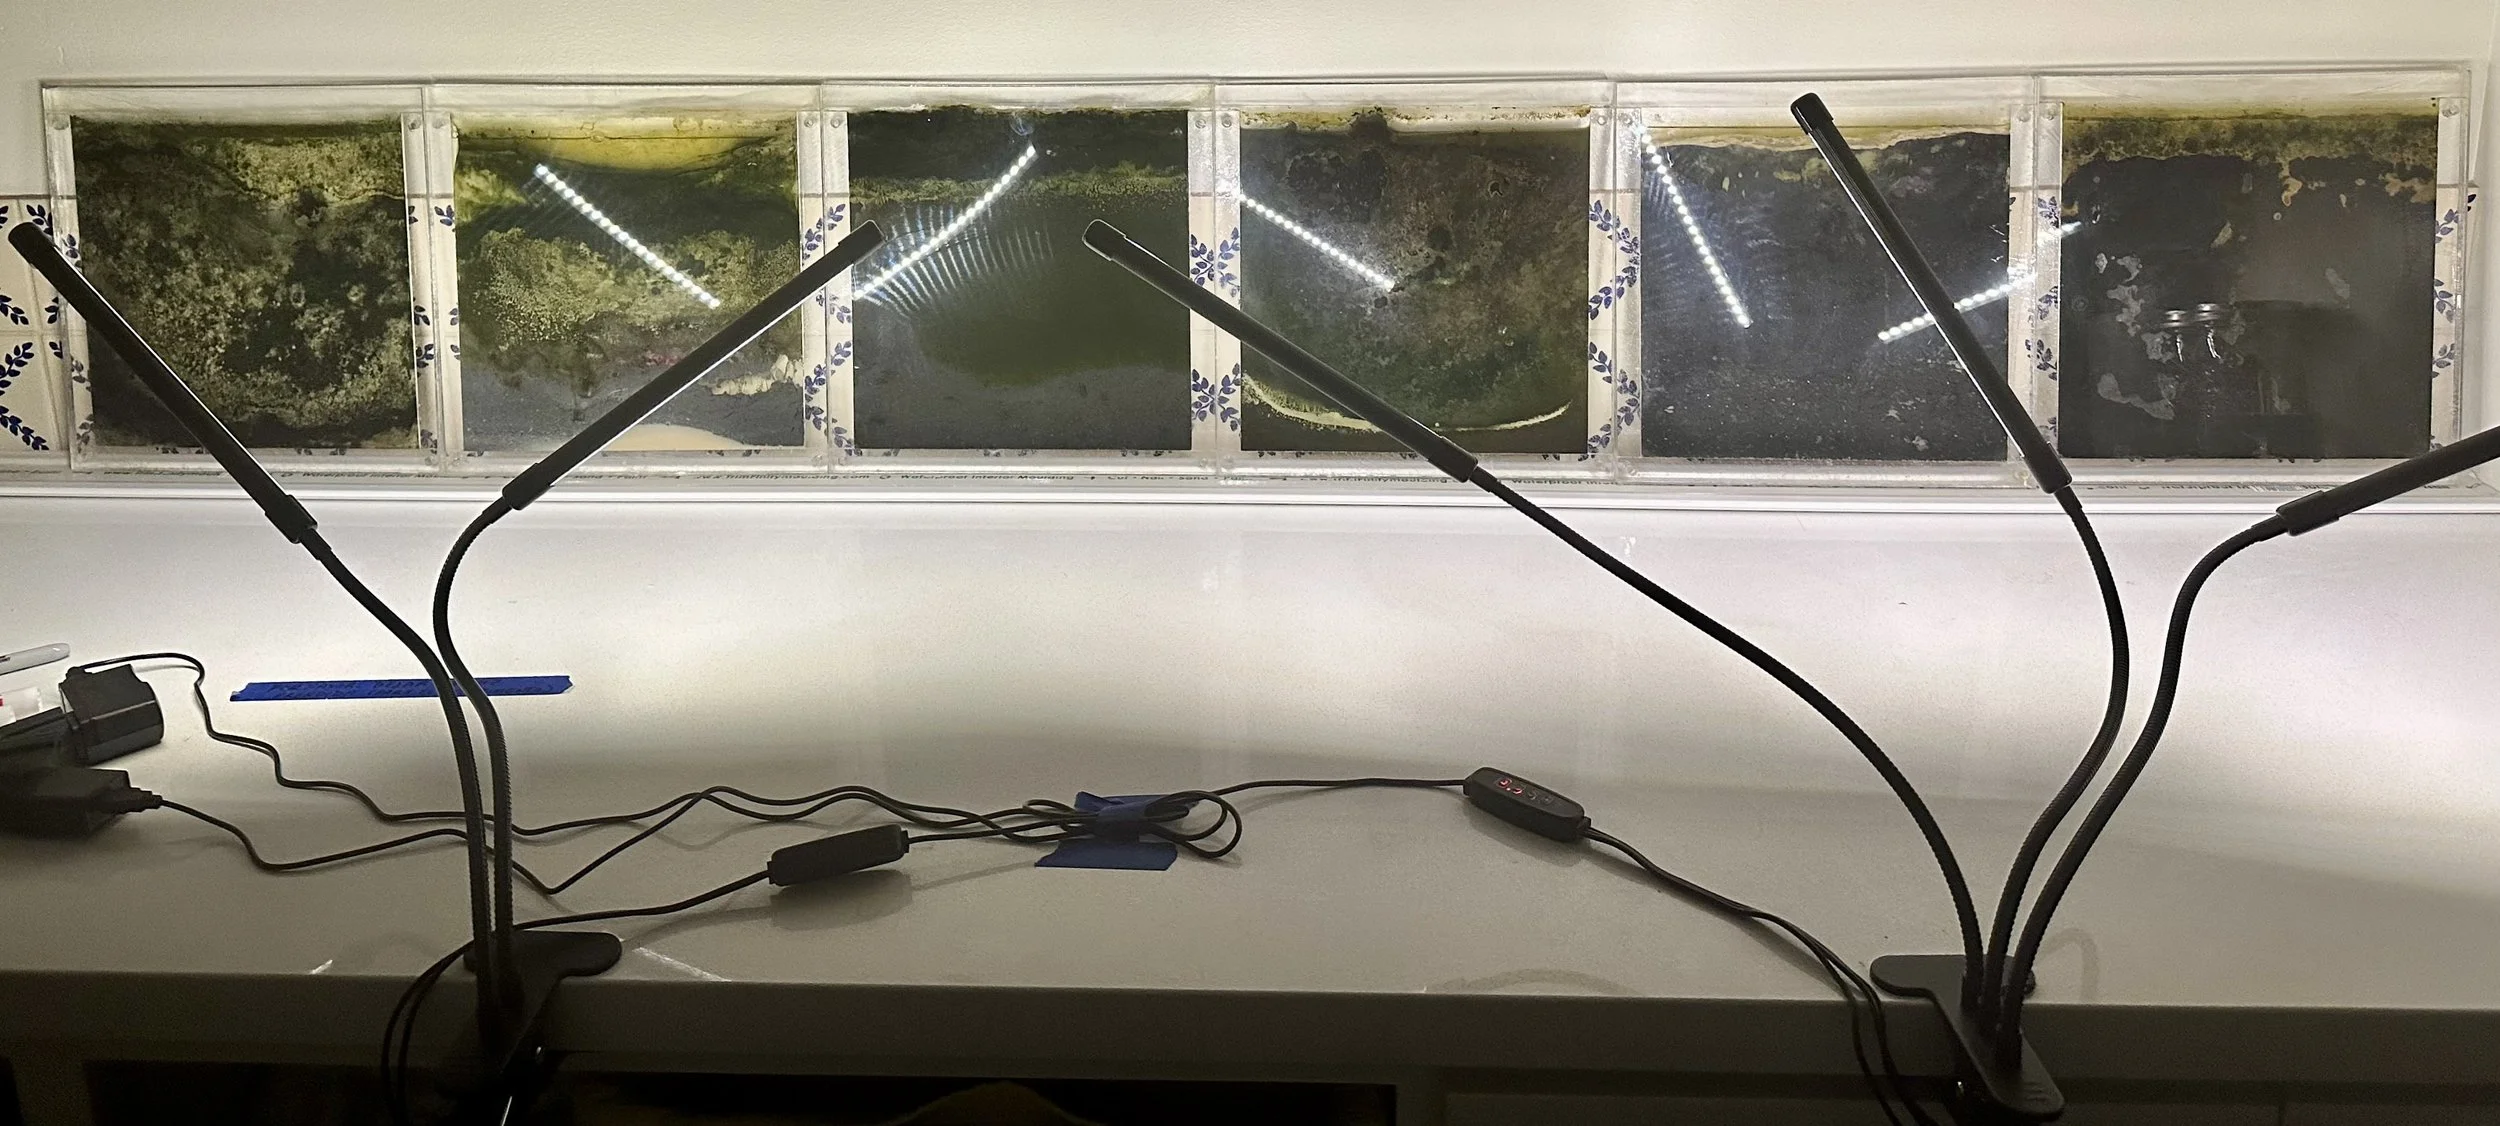
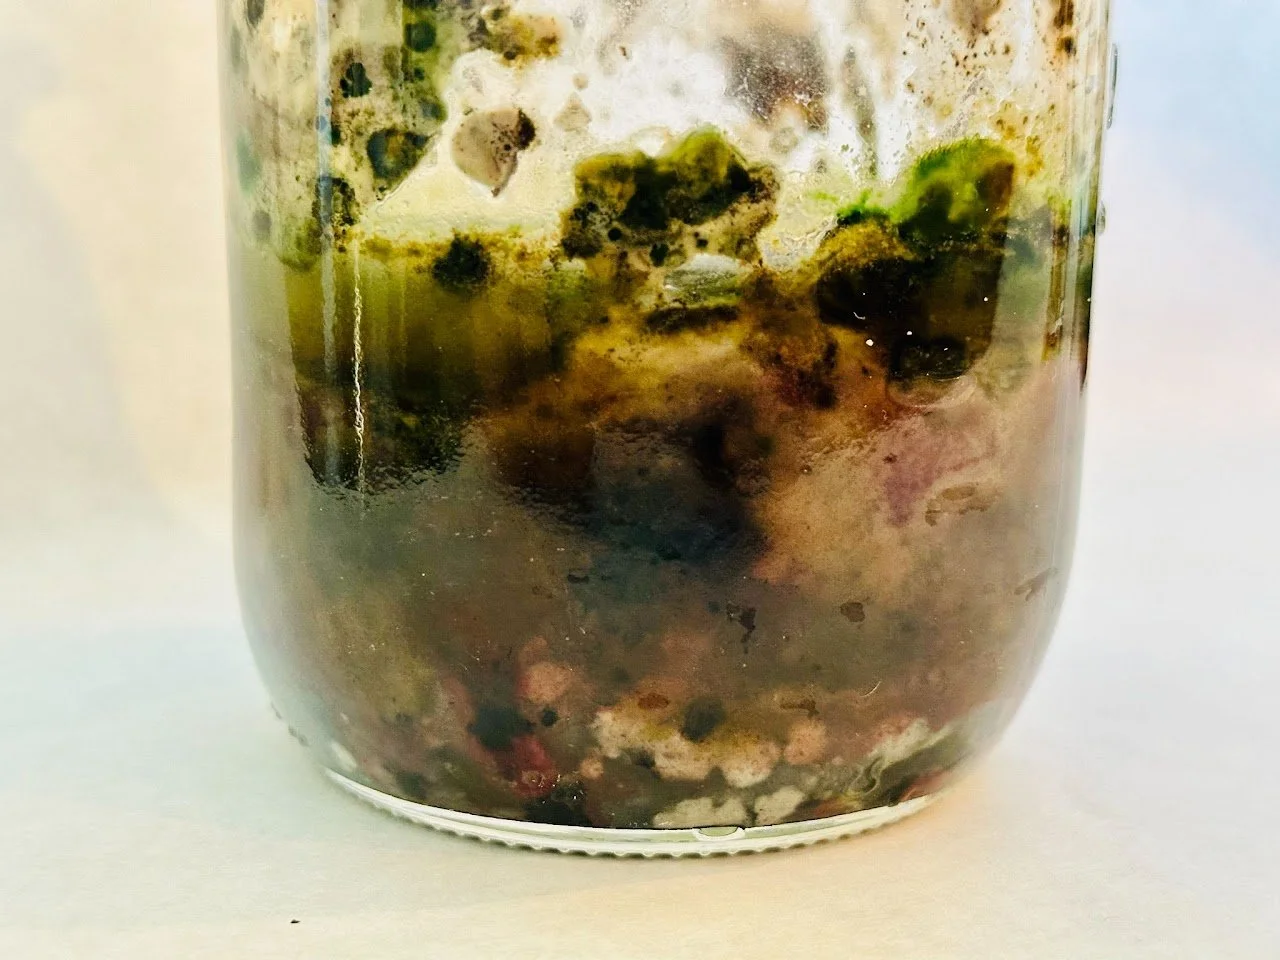
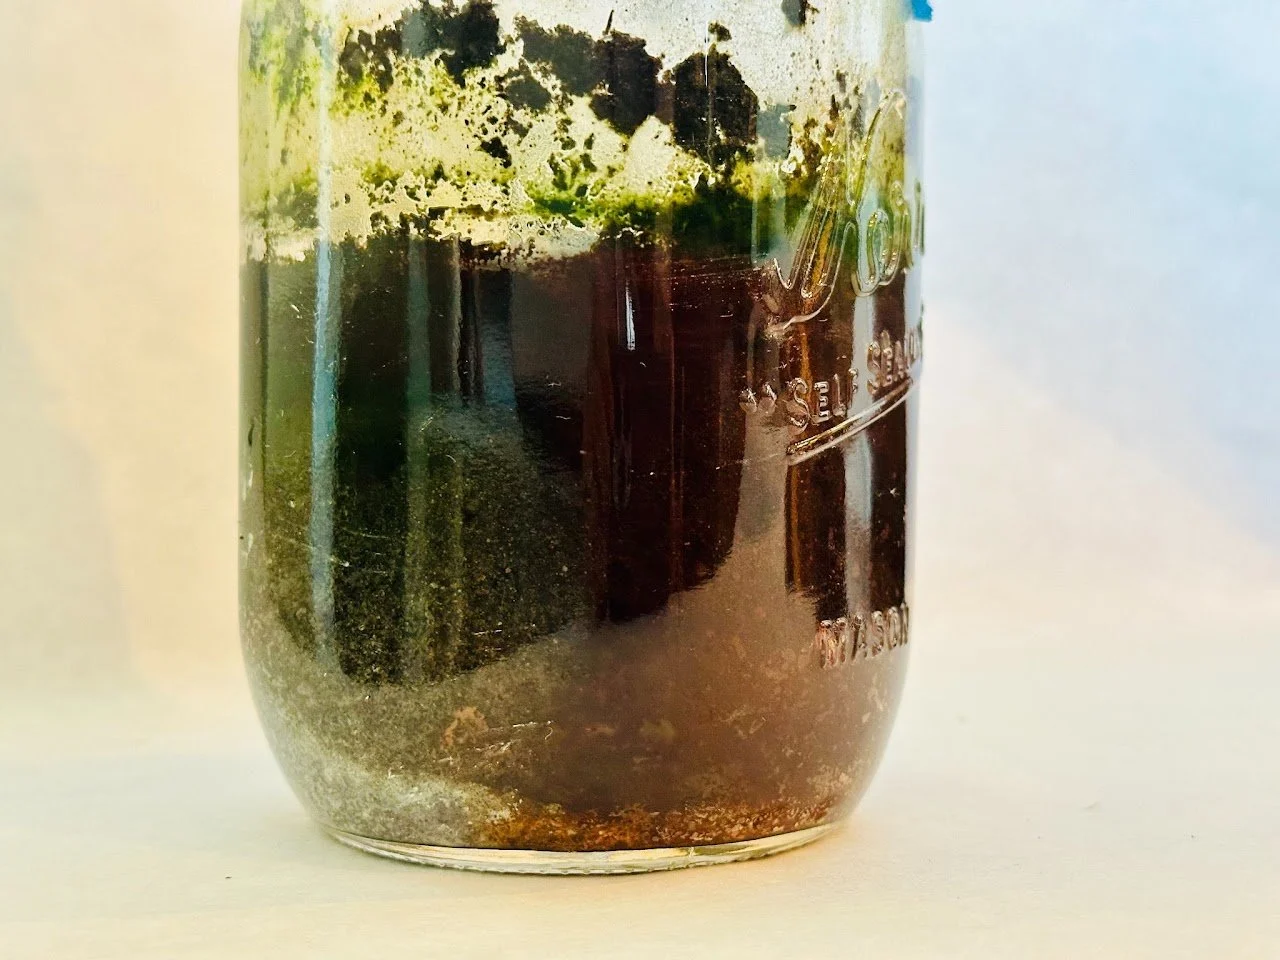
I arranged the jars in a temperature controlled room (65 degrees F) with five equally-distributed grow lights, and assessed the results over time. After three months, the samples looked like this:
I hypothesized that diatomaceous earth, a white dust-like substance results from the exoskeletons of diatoms, would provide for an excellent growth medium; due to it's white color, it might also make the microbial growth and color most vibrant. The results confirmed this hypothesis. However, I also found that silt alone could result in vibrant growth, depending on the specific sample.
I also observed that it takes a lot of time for the Winogradsky columns to develop. Even after three months, some some samples seemed static. Others were showing a gradient of colors, ranging from green to red to purple.
Design, Prototype, Test and Build
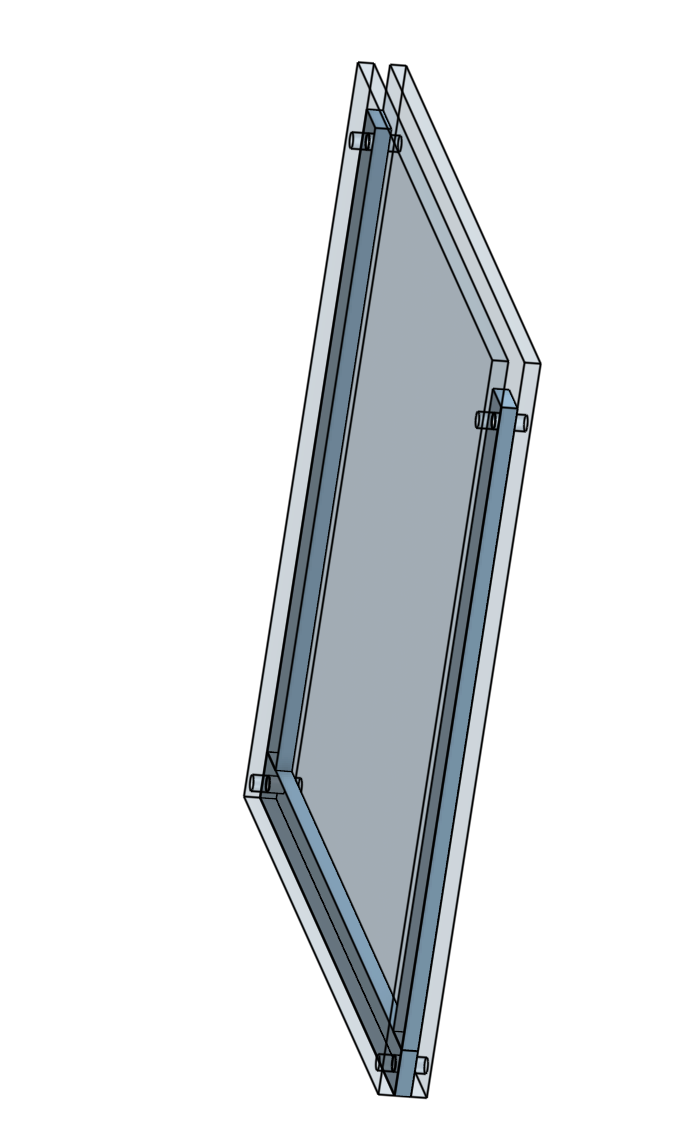
In parallel with the small-scale experiments, I began the design and engineering process for my final display. Moving away from the traditional cylindrical Winogradsky column design, I wanted to present my columns as flat panels, analogous to paintings within a frame.
With these aesthetic goals in mind, I used Onshape, a 3-D CAD program, to brainstorm ideas. I went through multiple iterations and dimensions. My ultimate design consists of 12" x 12" sheets for the front and back panels, with spacers on the bottoms and sides, to create a slim cavity that replicates a flattened aquarium tank. A key consideration was the material. After reviewing glass and acrylic sheets of various thicknesses, I decided upon 1/4" thick acrylic sheets. These sheets are both strong enough to resist the water pressure of the samples as well as thin enough to be completely transparent and elegant. I researched methods to adhere acrylic and decided upon an acrylic cement, which can effectively "meld" two pieces of acrylic through a chemical process.
Next, I build a prototype panel by cutting the acrylic sheets with a jigsaw. After assembly, I tested for water tightness and integrity under water pressure.
After confirming that the prototype worked, I graduated to final fabrication on the laser cutter. With Baxter's help, I laser-cut the designs I created in Onshape. When the first sheet came out, I was impressed by how much smoother it was compared to my jigsaw prototype. I fabricated and assembled 6 panels. I also purchased wooden frames that fit around these dimensions.